Real-world advice from 12 years at a Ford dealership

Author: admin

  • Why Does My Diesel Check Engine Light Come On and Then Go Off?

    Why Does My Diesel Check Engine Light Come On and Then Go Off?

    The question

    “My check engine light came on, stayed on for a couple of days, and then went off by itself. Is the problem fixed, or should I still get it checked?”

    An example question from a diesel truck owner

    The short answer

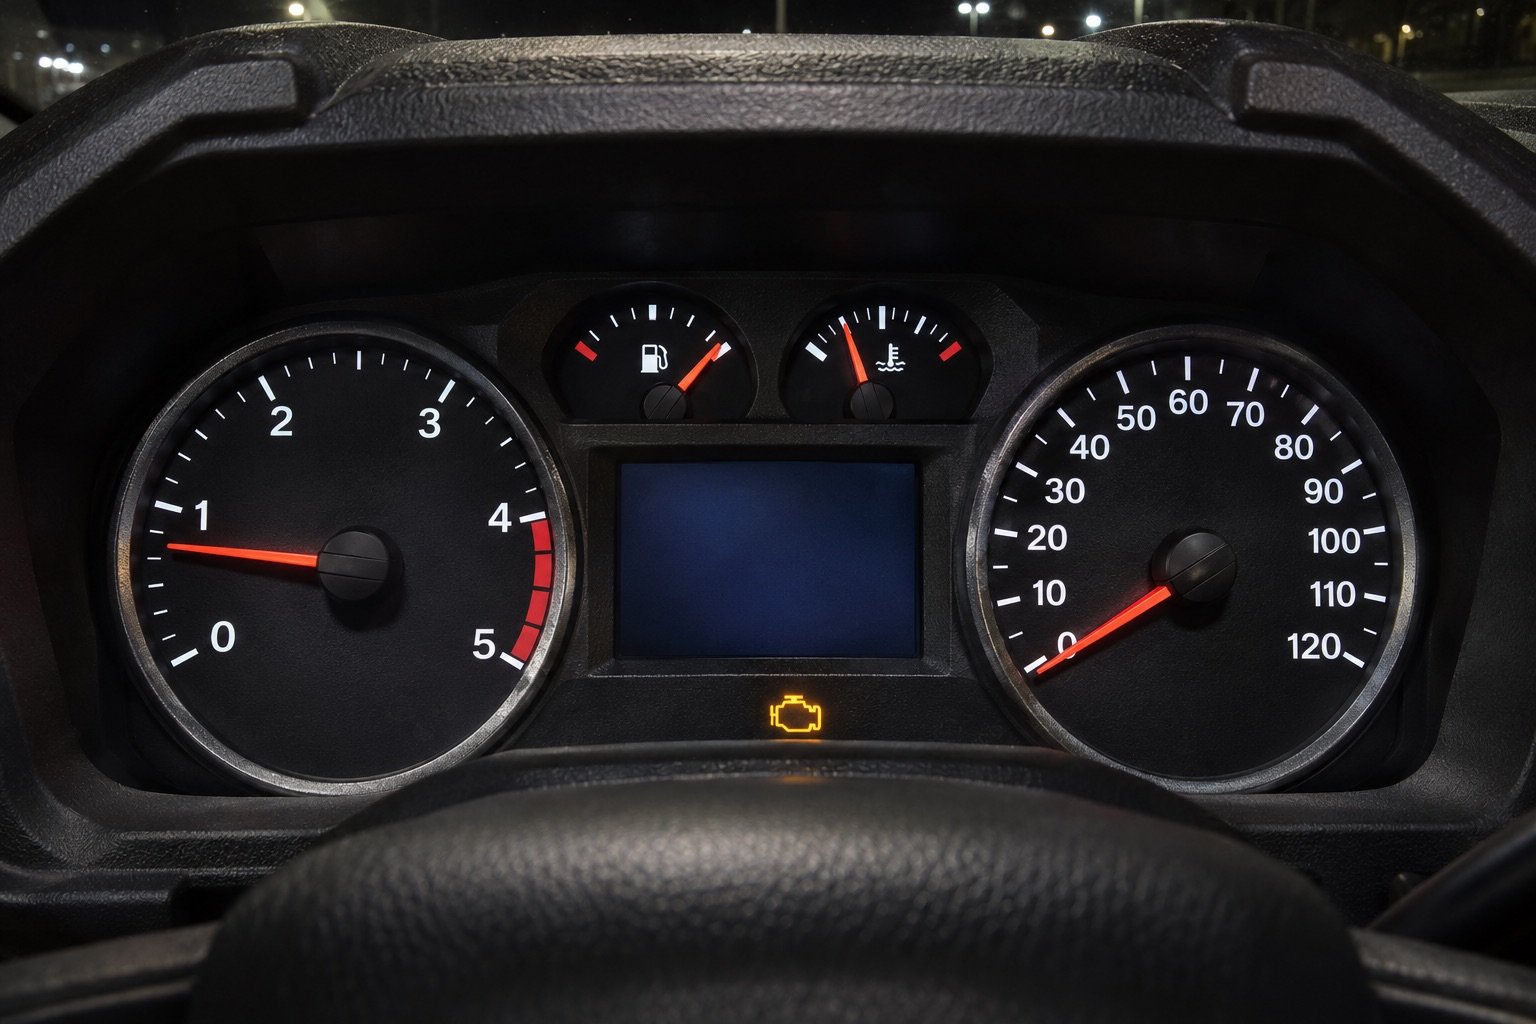
    The light going off does not mean the problem is fixed. It usually means the computer stopped seeing the fault for a while, and the code is often still stored. Have the codes read, including pending and permanent codes. And if the light ever flashes, slow down, stop towing or hauling heavy, and get it checked as soon as you can.

    The light went out, but you still need to decide whether the truck needs attention. Here is what is going on, the diesel causes I would look at first, and what I would do next.

    What the light is telling you

    Your truck’s computers watch the sensors and systems that affect emissions and how the engine runs. When one sees something outside the normal range, it stores a trouble code and turns on the check engine light.

    Many faults are only tested under certain conditions, like a cold start, a long steady drive, or a DPF cleaning. If the system runs the test again over a few drive cycles and everything looks normal, it can turn the light off by itself. The code usually stays in memory for a while, as a record of what happened.

    A drive cycle is not just starting the truck and shutting it off. It is a drive long enough, and varied enough, for the computer to run its tests: a cold start, some steady driving, and time at operating temperature. That is why a light can stay on through a week of short trips and then go out after a few longer drives.

    Steady light versus flashing light

    • A steady light means a fault was found. Get the codes read soon. Before you decide how far to drive, note any other warning lights or messages, and any change in how the truck runs.
    • A flashing light means a serious fault. Slow down, stop towing or hauling heavy, and get it checked as soon as you can. Your owner’s manual says what it means on your truck.

    On a diesel, also take DEF warnings and a water-in-fuel message seriously, whether or not the check engine light is on. Your owner’s manual explains what each warning light and message means for your truck.

    Common diesel causes of a light that comes and goes

    1.NOx sensors

    A diesel with modern emissions equipment uses NOx sensors in the exhaust to check that the system is working. A sensor that is starting to fail can set a code, pass the next test, then fail again.

    2.DEF quality or the DEF system

    Old, contaminated or diluted DEF can set codes, and so can a problem in the DEF system itself. Watch for DEF messages on the dash along with the check engine light. Ignored DEF warnings end in a speed limit. Your owner’s manual explains the warning steps.

    3.The DPF pressure sensor

    The truck measures exhaust pressure across the diesel particulate filter to decide when it needs to clean itself. A sensor or a cracked sensor hose can give bad readings that come and go, especially with heat and vibration.

    4.Glow plugs

    Glow plugs help a diesel start in the cold. A weak glow plug or its circuit can set a code on cold mornings and then look fine all afternoon.

    5.Wiring and connectors

    A loose connector or a wire that rubs on something can make a fault come and go with bumps, heat and rain. Exhaust sensors live in a hot, dirty place, so their wiring takes a beating.

    What about the fuel cap?

    The 2017 and 2026 Super Duty manuals show the diesel owner how to remove and refit the fuel filler cap. If the truck shows a “Check Fuel Cap” message, take the cap off, check the seal, and put it back on correctly. Do not assume a check engine light is the cap, though. On a diesel, the causes above are more likely to be your answer.

    Pro tip

    Write down when the light came on: cold or warm, towing or empty, highway or town, rain or dry. That note helps a technician find the fault.

    What I would do

    1.Read every module, not just the engine

    A basic reader may show only current codes. Ask for pending and permanent codes too, and have the other modules scanned. Use a scan tool that can do that, or have a shop do it.

    2.Do not just clear it and forget it

    Clearing the code turns the light off, but it also wipes information a technician could use. If you clear it, write the code down first. Clearing codes also resets the emissions readiness checks, so the truck can fail a state inspection until they run again.

    3.Watch for other signs

    Rough running, loss of power, a strong fuel smell, a hot smell, or a temperature gauge climbing are all reasons to stop and get help instead of waiting.

    4.Get it diagnosed if it comes back

    A light that comes back is the truck telling you the problem is real. Ask the shop to explain what they found and why they recommend a repair, and whether there are any recalls or service bulletins for your truck and your code.

    When it is time to stop driving

    Pull over safely and call for help if the engine shakes badly, if the temperature gauge goes into the red, if the oil pressure warning comes on, or if you smell something burning. Those are not wait-and-see problems.

    The bottom line

    A check engine light that goes off by itself still needs a look. On a diesel, read every module, note when it happens, and never ignore a flashing light. When in doubt, a qualified diesel technician with a proper scan tool is the right next step.
  • Home Garage Tool List: The Basics Every Truck Owner Should Have

    Home Garage Tool List: The Basics Every Truck Owner Should Have

    The short answer

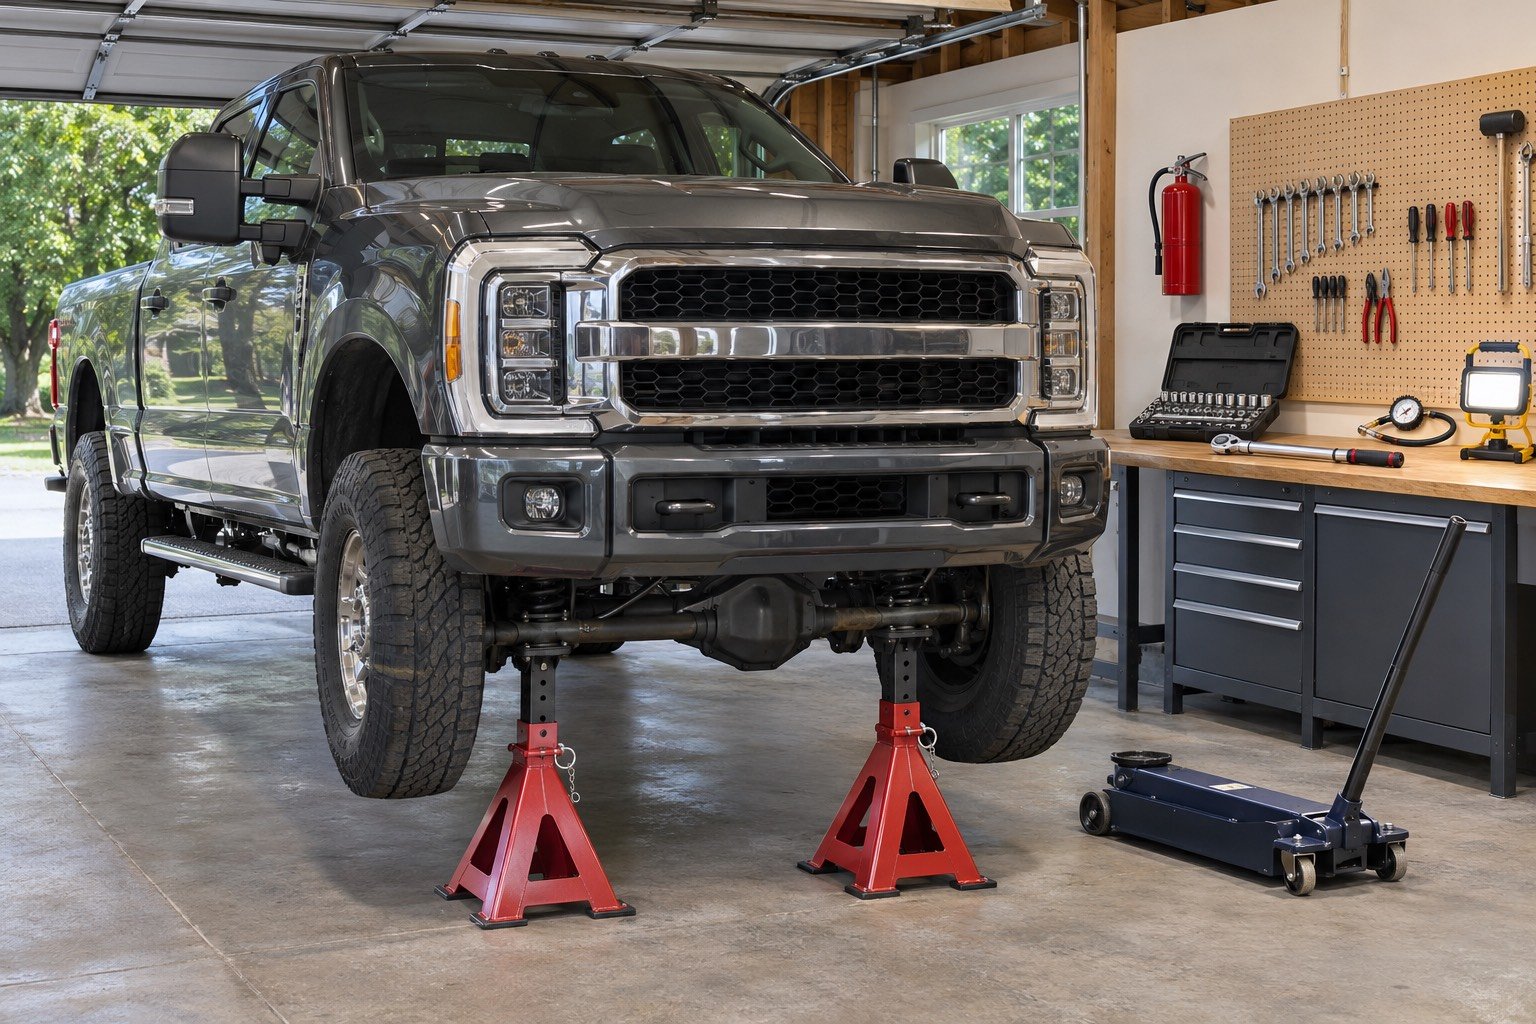
    Start with the job you want to do, then buy the tools it needs. For basic checks, a tire pressure gauge, a work light and a code reader go a long way. For wheel and lifting jobs, buy a torque wrench that reaches your truck’s lug nut spec, a floor jack that can reach the axle, and tall stands rated for your truck. Buy quality where safety depends on it.

    Start with the job you want to do, then buy the tools it needs. A full wall of tools you never use helps less than a few good ones you know how to use.

    Here is the list I would build a truck owner’s garage around, grouped by the kind of job. I am naming tool types, not brands. A heavy-duty truck changes a few of the buying rules, so I point those out as we go.

    Basic checks

    1.A tire pressure gauge and a portable inflator

    Check your tire pressure when the tires are cold, and set it to the number on the door jamb label, not the number on the sidewall. A good gauge is cheap. A portable inflator that plugs into the truck means you can fix low pressure at home or on the road. Check that the gauge and the inflator can reach the pressure on your door label. Many car-sized ones cannot.

    2.A good work light

    You cannot fix what you cannot see. A rechargeable LED work light with a magnet or hook frees up both hands. A headlamp is a great second light for looking under the dash or into a wheel well.

    3.An OBD2 code reader

    When the check engine light comes on, a code reader tells you where to start looking. It does not tell you what part to buy. A basic reader may show only current codes. A scan tool that also shows pending and permanent codes, and can scan the other modules, is worth the extra money if you want the full picture.

    Wheel and lifting jobs

    4.A socket set, ratchets and a breaker bar

    Most jobs on a truck start here. Get a set with standard and deep sockets in the sizes your truck uses, a few extensions, and a breaker bar for stuck bolts. Lug nuts on a heavy-duty truck are tight, and a breaker bar saves your ratchet.

    5.A torque wrench that reaches your lug nut spec

    Lug nuts, hitch bolts and drain plugs all have a torque specification for a reason. On a Super Duty, the lug nut torque is higher than many car-sized torque wrenches can reach, and Ford changed it over the years. The 2017 owner’s manual lists 165 lb.ft, and the 2026 manual lists 150 lb.ft. Use the number for your model year, and buy a torque wrench whose range covers it with room to spare. Both manuals also say to retighten the lug nuts within 100 miles after a wheel has been off.

    Pro tip

    Store a click-type torque wrench at its lowest setting, and do not use it as a breaker bar. It is a measuring tool.

    6.A floor jack that can reach the axle

    A 4×4 Super Duty sits high. A low-profile car jack may not reach the axle at all, and a jack at the end of its travel is not a safe jack. Look for a heavy-duty jack with enough lift height to reach your truck’s lift points, and a rating above the weight on the axle you are lifting. The front and rear axle weight ratings (GAWR) are printed on the label in the driver’s door jamb. That is a good number to buy against.

    7.Tall jack stands, rated for your truck

    Never work under a vehicle held up only by a jack. Buy a pair of tall stands that reach your truck’s lift points without being fully extended, with the pair rated above the axle weight you will put on them. Put them under the lift points your owner’s manual shows, on flat, solid ground, and chock the wheels that stay on the ground.

    This is the one place I would never save money.

    Hand tools

    • Combination wrenches in the sizes your truck uses
    • Screwdrivers, flat and Phillips, plus a set of Torx bits
    • Pliers: needle nose, slip joint and locking pliers
    • A dead blow hammer
    • A utility knife and a set of picks

    Fluids and cleanup

    An oil drain pan big enough for a diesel oil change, a funnel set, shop towels, nitrile gloves, and a container for used oil. Many auto parts stores take used oil for recycling. Call first. Never pour it on the ground or into a drain.

    Safety gear, next to the job

    Keep safety glasses and gloves with the tools you use them with, not in a drawer across the garage. Hang an ABC-rated fire extinguisher near the door, where you can reach it, not behind the thing that is burning. An ABC unit covers ordinary materials, flammable liquids and electrical fires, which is what a garage can have.

    If you tow, add these

    • A tongue weight scale, so you know your number before every trip
    • Wheel chocks and leveling blocks
    • A lug wrench that fits both the truck and the trailer
    • A circuit tester for the trailer plug and lights
    • Spare bulbs and fuses for the truck and the trailer

    Your first job with these tools

    Start with a simple, useful job: check and set the tire pressures with your gauge and inflator. When you are ready for a wheel job, use the socket set, breaker bar and torque wrench to check the lug nut torque against the value for your model year. You learn how each tool feels before you need it for something bigger.

    Before any job, lay out the tools its instructions call for, and check that each one is there and in good condition.

    What I would wait on

    Air tools, an impact wrench, specialty pullers and a big rolling toolbox are all nice. Buy them when a real job needs them.

    Know when to stop

    Some jobs need a lift, special tools or training: brakes on a heavy truck, anything on the high-pressure fuel system of a modern diesel, air bags and many electrical repairs. If a job involves safety systems or you are not sure, take it to a professional. Knowing when to hand it off is part of being good at this.

  • Used Truck Buying Checklist: What a Service Advisor Checks First

    Used Truck Buying Checklist: What a Service Advisor Checks First

    The short answer

    Look under it before you look at it. Check for leaks, frame and body damage, start it cold, read the service records, make sure the emissions equipment is all there, and take a real test drive. Then pay a trusted shop for a pre-purchase inspection before you sign anything.

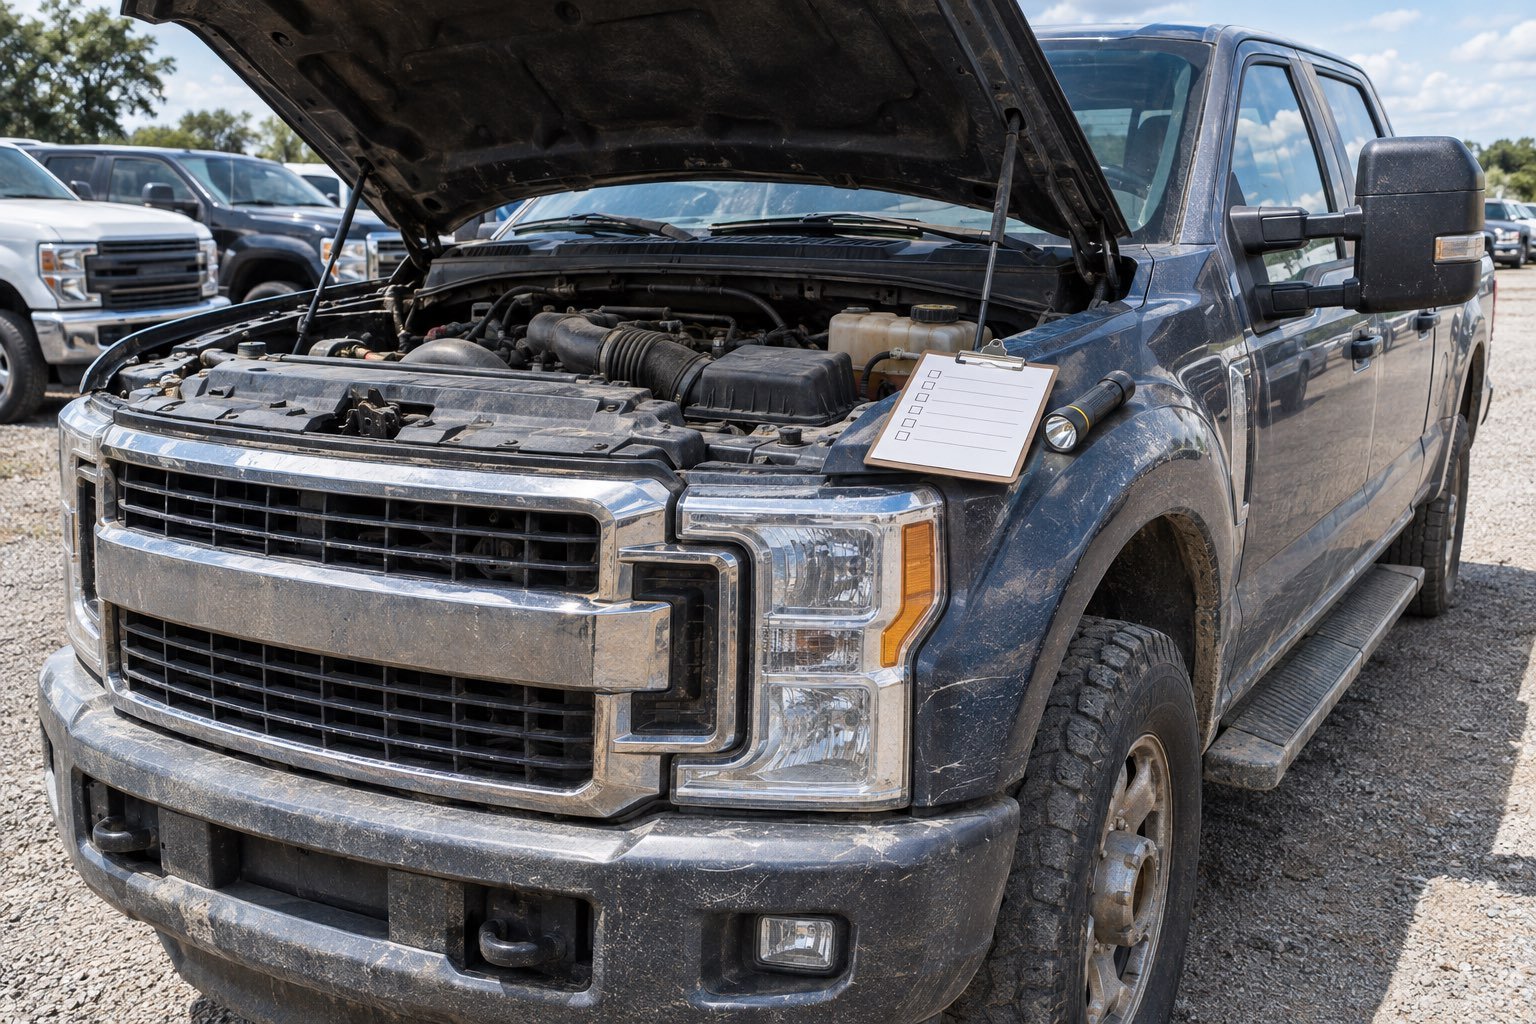
    Before you agree on a price, check the truck underneath, start it cold and read the service records. Problems that are easy to spot in a driveway are much cheaper to find before you sign than after.

    This is the checklist I would use myself, in the order I would use it. Bring a flashlight, a rag, and a friend if you can. And plan to walk away if the seller rushes you.

    1.Look underneath first

    Get low and look at the ground under the truck, then at the engine, transmission, transfer case and axles. Fresh drips, wet spots and caked-on grime are all worth a question. A little old dirt is normal. A freshly washed engine bay on a work truck is worth a question too, though it is not proof of anything by itself.

    Check behind the wheels for brake fluid or gear oil, and look at the shocks for oil running down the body.

    2.The frame

    Surface rust on a steel truck frame is common, especially where roads are salted. What you want to avoid is rust that flakes in layers, holes, or soft spots. Tap suspicious areas with the handle of a screwdriver. Look closely around the spring mounts, the crossmembers and the hitch area.

    Also look for welds, kinks or fresh paint on the frame. Those can mean a past repair or an accident that never showed up on a report.

    3.The body

    The cab corners, rocker panels and bed supports are body, not frame, and they deserve their own look.

    On a 2017 or newer Super Duty, the body is aluminum on a steel frame. Aluminum does not rust like steel. Corrosion tends to show up as bubbling paint or white, chalky spots, often around edges and where steel parts touch the aluminum. On older trucks, look for classic rust in the same places.

    Pro tip

    Wear around the hitch is a reason to ask what the truck towed and how often. Marks alone do not tell you its towing history.

    4.Start it cold

    Ask the seller not to start the truck before you arrive, and put your hand on the hood to check. A cold start shows you things a warm engine hides: hard starting, rough idle, smoke, and ticks or knocks that fade once the oil is warm.

    Check that all the warning lights on the dash come on at start and then go out. On a diesel in cold weather, ask whether the block heater works and when the truck was last plugged in.

    5.Check the fluids

    Pull the oil dipstick. Look at the color and smell, and check for a milky look, which can mean coolant in the oil. Look at the coolant level and color in the reservoir with the engine cold. If the transmission has a dipstick, check that fluid as well. It should not smell burnt.

    6.Read the paperwork

    Ask for service records. A stack of receipts or a dealer printout is a very good sign. No records at all does not mean the truck is bad, but it means you are trusting your inspection more.

    Run a vehicle history report, and check for open recalls with the VIN on the manufacturer’s site or the NHTSA site. On a Ford, ask a Ford dealer whether they can see service history for that VIN. Make sure the VIN on the title matches the VIN on the dash and the door jamb.

    7.Take a real test drive

    Drive it on the kinds of roads you will really drive. Include a highway on-ramp, some stop and go, and a few bumps.

    • Does it shift smoothly, with no slipping or hard bangs?
    • Does it track straight, and does the steering wheel sit centered?
    • Do the brakes stop straight with no pulsing or grinding?
    • On a 4×4, does four-wheel drive engage the way the owner’s manual describes? Test it briefly, at low speed and going straight, on gravel or another loose surface. Do not drive in four-wheel drive on dry pavement; it can damage the driveline.

    After the drive, look underneath again for anything that started dripping. Then sit in the truck with the engine running and the doors closed. Smell for coolant, fuel or burning oil, and look at the wear on the seats, pedals and steering wheel. Heavy wear on a truck with low miles on the dash is worth a careful question.

    8.Extra checks on a diesel

    Ask when the fuel filters were last changed, and look for the receipts.

    Then check that the emissions equipment is all there and working. Under federal law, the Clean Air Act forbids anyone to knowingly remove or render inoperative an emissions control device, and to make, sell or install defeat devices. That applies in every state. A Ford dealer can refuse to work on the engine or emissions system of a deleted truck, warranty claims can be denied, and putting the equipment back can be expensive. Signs to look for:

    • A tuner or other device plugged into the OBD port under the dash.
    • A missing DEF tank or DEF fill, or a DEF gauge that never moves.
    • Black smoke under hard acceleration. A diesel with a working DPF should not blow black smoke.
    • A straight pipe where the exhaust treatment parts should be.

    A truck with no plug-in tuner can still be tuned. A tune can live in the engine computer itself. A Ford dealer can read the software version for you.

    Also compare the engine hours with the miles. A truck that idled for long hours or worked a job site can have low miles and a lot of engine hours. And check both coolant reservoirs, not just the one you see first.

    On the test drive, listen for a hiss or a whistle that gets louder than normal under load, along with weak power. Those can mean a boost or exhaust leak. Check for new warning lights after the drive.

    9.Questions to ask the seller

    • Why are you selling it?
    • What did you use it for, and did it tow? How heavy?
    • Who did the maintenance, and do you have the records?
    • Has it been in an accident or had paint work?
    • Is there anything that does not work right now?

    Then check each answer against the records and the inspection. An answer you can confirm is worth more than an answer that sounds good.

    10.Pay for an inspection

    Even if everything looks good, take the truck to a shop you trust for a pre-purchase inspection. A technician with a lift and a scan tool will see things you cannot see in a driveway. A seller who will not allow an inspection is giving you an answer.

    Before you decide

    Write down three lists: faults the inspection found, records still missing, and questions the seller has not answered. If the lists are short and the price reflects them, you may have found your truck. If they are long, there will be another truck.

  • How to Set Up a Weight Distribution Hitch on a Super Duty

    How to Set Up a Weight Distribution Hitch on a Super Duty

    The short answer

    Know your truck’s ratings, weigh the loaded rig, and record your starting measurements. Then set the hitch head height and spring bar tension to restore front axle load to the target for your truck. Ford’s 2027 towing guide recommends restoring 50 percent of the front axle load. Test drive and recheck before the real trip.

    A weight distribution hitch is one of the best things you can add to a Super Duty towing setup. It is also easy to set up wrong and never notice. A good hitch with a bad setup still tows badly.

    Here is the order I would work in. Your hitch maker’s instructions are the final word on the hardware. This guide is about the order of the steps and what you are trying to achieve.

    What the hitch actually does

    When you drop a trailer tongue on the hitch ball, the back of the truck goes down and the front comes up. That takes weight off your front tires, which steer and do a big share of the braking. A weight distribution hitch uses spring bars to move some of that weight back to the front axle and to the trailer axles.

    Many of these hitches also include sway control. Sway control helps, but it is not a fix for a trailer that is loaded wrong.

    1.Know your ratings before you hitch

    Look at four places before you buy or adjust anything:

    • The receiver label. It lists two ratings: one for weight carrying (no spring bars) and one for weight distributing. Use the one that matches how you tow, and never exceed its tongue weight. On the 2027 Super Duty, Ford lists the same number for both: an F-250 is rated for 22,000 lb with 2,200 lb of tongue weight, and an F-350 single rear wheel for 25,000 lb with 2,500 lb. Check your own truck’s label, because ratings change by year and model.
    • The payload sticker on the driver’s door jamb. Tongue weight, passengers and gear all count against payload.
    • GAWR, the gross axle weight rating for the front and rear axles, on the door label. The rear axle carries most of the tongue weight.
    • GCWR, the gross combined weight rating for truck plus trailer, in your owner’s manual or Ford’s towing guide.

    2.Weigh the rig, loaded

    Load the trailer the way you will really travel, with water, gear and propane. Ford’s rule for conventional trailers is a tongue weight of 10 to 15 percent of the total trailer weight.

    A truck scale gives you real numbers. Weigh in three passes: the truck alone, loaded for the trip; the truck and trailer hitched with the spring bars off; and the truck and trailer with the spring bars on. Compare the front axle numbers across the passes and you can see how much load the hitch puts back on the front axle.

    Pro tip

    The trailer you weigh empty at the dealer lot is not the trailer you tow. Weigh it loaded for a trip.

    3.Measure the truck before you hitch up

    Park on level ground. With the truck loaded the way you travel, but with no trailer, measure from the center of each wheel hub straight up to the edge of the fender. Write down the front and rear numbers. These are your starting measurements.

    4.Set the hitch head height and tilt

    Level the trailer with its jack and measure the height of the coupler. Set the hitch head on the shank so the trailer will ride level, or the way your hitch maker says. Most shanks have several holes for this. Set the head tilt the way the instructions describe, because the tilt changes how much the spring bars can do.

    Torque the hitch ball and every head bolt to the values in the hitch instructions. Write the date on a piece of tape on the shank so you remember when you checked them.

    5.Hitch up and tension the spring bars

    Couple the trailer, latch and pin the coupler, cross the safety chains, and connect the breakaway cable and the electrical plug.

    Now take the second measurement. With the spring bars off and the trailer jack fully retracted so the whole tongue rests on the truck, measure the front and rear fender heights again and write them down. This is the hitched measurement.

    Then raise the tongue a little with the trailer jack, attach the spring bars as your hitch’s instructions describe, and retract the jack fully again so it carries no weight at all.

    6.Measure a third time and compare to the target

    With the bars on, measure the front and rear fender heights a third time. Compare the front measurement with the target for your truck and record it before you make another change.

    Ford’s 2027 towing guide recommends 50 percent front axle load restoration when you use load bars. The 2017 owner’s manual describes the same target by height: set the front fender height halfway between the unhitched and hitched measurements. Both methods aim at about the same result. Use the one in the guide or manual for your model year.

    If the front is still too high, add spring bar tension the way your hitch allows. If you have gone past the target, back it off. Do not crank the bars as hard as possible to make the truck sit level. Too much tension can take load off the rear axle and cause its own handling problems.

    7.Test drive and recheck

    Drive a short loop at low speed first, then at road speed somewhere safe. Pay attention to how the steering feels, how the trailer follows, and how the brakes feel.

    After the first trip, check the bolts again and look over the spring bars and brackets. Hitches settle in.

    Do not forget the trailer brakes

    A weight distribution hitch helps the truck handle the load. It does not stop the trailer. Most travel trailers have electric brakes, and your truck needs a brake controller set up for them. Check whether your truck has a built-in trailer brake controller.

    Set the controller gain with the trailer loaded, on a dry, empty road at low speed. Also test the breakaway switch in the driveway before every trip, the way the trailer’s manual describes. It is the part that stops the trailer if it ever comes loose. Put the pin back right away.

    Common setup mistakes

    • Setting the hitch up with an empty trailer, then loading it full for the trip.
    • Checking only the tow rating and forgetting payload and the receiver label.
    • Using sway control to cover for a trailer with too little tongue weight.
    • Never rechecking bolt torque after the first trip.

    When to get help

    If the trailer sways, follow the sway steps in your owner’s manual, then pull over safely. If anything else feels wrong on the road, like light steering or a porpoising ride, pull over safely and check the setup before you go on. A good RV dealer or hitch shop can set the system up with you and show you what to look for.

  • 6.7L Power Stroke Maintenance: 7 Things I Would Never Skip

    6.7L Power Stroke Maintenance: 7 Things I Would Never Skip

    The short answer

    Keep clean fuel going in, use the oil and coolant Ford specifies for your model year, drain the water separator, keep the driveline fluids fresh if you tow, and treat the DEF and emissions parts with respect. Start with your truck’s model year, mileage and service records, then work out what is due next.

    After 12 years as a Ford dealership service advisor, my starting point for 6.7L maintenance is simple: know what is due for your truck, do it on time, and keep a record of it.

    This is not a full maintenance schedule. The schedule in your owner’s manual changes by model year and by how you use the truck, and it is the final word on intervals. This is the short list of jobs I would never let slide on a 6.7L, and why each one matters.

    1.Both fuel filters, as a pair

    The 6.7L uses two fuel filters. One sits in the diesel fuel conditioner module on the frame, next to the fuel tank. The other is mounted on the engine, under the hood. It is easy to remember one and forget the other. Change them together.

    The reason is the high-pressure fuel system. It does not tolerate water or dirt, and a fuel filter costs far less than a contaminated fuel system.

    After a filter change, prime the system the way Ford describes: turn the key on for 30 seconds, then off, and repeat. That is in both the 2017 and the 2026 owner’s manuals.

    Pro tip

    Use filters that match the factory part. A filter that “fits” is not always a filter that filters to the same standard.

    2.Drain the water separator

    The frame-mounted fuel conditioner module has a water separator with a drain. When the truck tells you there is water in the fuel, do not ignore the message. Drain it with the engine off, and catch the fuel in a container. Then prime the system, and think about where you filled up last.

    Draining it during oil changes is a good habit even without a warning. It takes a few minutes and you see right away if something is wrong.

    3.Ford-spec oil, on the right schedule

    Ford does not just ask for “diesel oil”. It asks for oil that meets Ford specification WSS-M2C171-F1. The 2026 manual lists Motorcraft 10W-30 as the main oil, with 15W-40, 5W-40 and 0W-40 listed for cold weather, biodiesel or severe use. Look for the Ford spec on the bottle, not only the viscosity.

    Follow the oil life monitor. If you tow, idle a lot, drive in dust or make many short trips, also follow the special operating conditions schedule for the other items.

    4.Two cooling systems, and the right coolant for your year

    The 6.7L has a primary cooling system and a secondary one. Both need the correct coolant at the correct level, and both have hoses and connections to inspect. The second reservoir is easy to miss.

    The correct coolant changed over the years. The 2017 manual calls for Motorcraft Orange Prediluted. The 2026 manual calls for Motorcraft Yellow Prediluted. Do not guess and do not mix types: check the manual for your exact model year.

    Never open a hot cooling system. Let the engine cool down fully first.

    5.DEF, and letting the emissions system do its job

    Diesel exhaust fluid is simple stuff, but it is easy to ruin. Buy sealed containers, keep them out of direct sun and heat, and never put anything else in the DEF tank.

    If DEF ever goes into the diesel fuel tank, do not start the engine. The 2026 owner’s manual says the tank must be fully drained and cleaned first, and it warns of fuel pump and injector failure that the warranty may not cover. Call for a tow instead of turning the key.

    Your truck also cleans its diesel particulate filter (DPF) on its own, often at steady highway speed. Lots of very short trips can keep it from finishing. If your driving is mostly short hops, a regular longer drive helps. When the truck shows a cleaning message, let it finish instead of shutting the engine off again and again.

    6.Transmission, axle and transfer case fluids

    The engine gets the attention, but a truck that tows puts a lot of heat into the transmission, the axles and, on a 4×4, the transfer case. These fluids are easy to forget because nothing tells you they are tired until something is wrong.

    If you tow, plow or haul heavy loads, these services often fall under the severe use schedule. Have them checked on that schedule, and ask for the fluid that matches the factory specification.

    7.Air filter, belts and hoses

    A diesel moves a lot of air. A dirty air filter costs you power and fuel, so check it more often on gravel or dirt roads. While the hood is up, look at the belt for cracks or glazing, and squeeze the hoses. Soft, swollen or cracked hoses are cheap to replace in your driveway and expensive to replace on the side of the highway.

    Signs something needs attention now

    Some things should not wait for the next scheduled service:

    • A water-in-fuel message that keeps coming back after you drain the separator.
    • A coolant smell, or coolant levels that drop between checks.
    • Hard starting, rough running, or a loss of power under load.
    • DEF or emissions warnings that do not clear.
    • Smoke that is new for your truck.

    Do not wait for the next service appointment. Ask a qualified diesel technician about any new warning or symptom.

    Keep a record

    Write down every service: date, mileage, what was done, and which parts and fluids went in. It keeps you on schedule. It helps any shop that works on the truck. And when you sell the truck, a clean record helps the next owner trust it.

    Want a guide and a place to record your maintenance? Take a look at my Ford 6.7L Power Stroke Owner Guide and maintenance tracker bundle.

    The bottom line

    Do the basics on time, with the parts and fluids Ford specifies for your model year. That is what keeps a 6.7L working the way it should.